
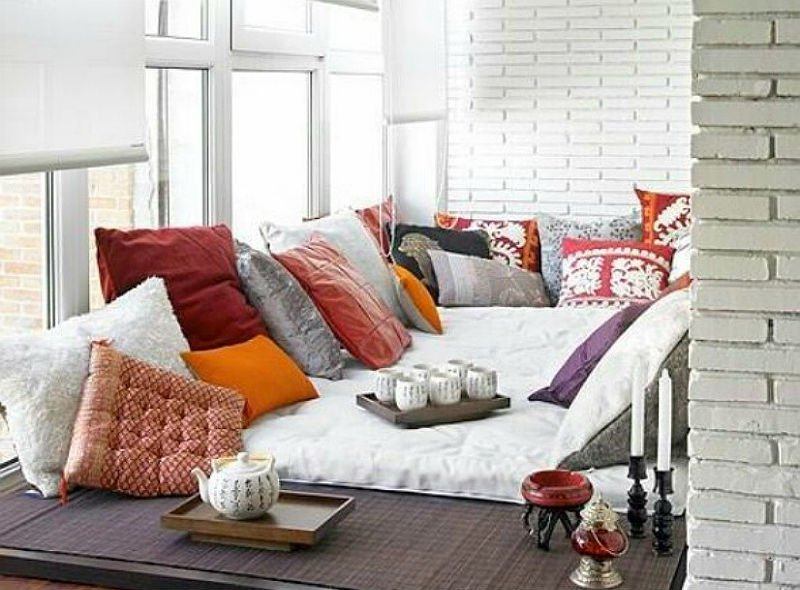
Photo-The Fashion Medley My friend Elle posted this picture above of a Pillow Corner on Pinterest and as soon as I saw it I re-pinned that bad boy. Firstly, how cosy does that look? Crawl in there with a good book and if you are anything like me fall asleep after two pages, and have a nap. I am sure you would have a pretty nice nap. Secondly, on a personal level it reminded me of when I was a tiny bub and the really hot summers London used to get which has somewhat become a national myth; my parents used to lay out two double duvets, throw a couple of sheets and blankets on there and we would all play and hang out there for most of the day. My sisters and I would roll around, faux wrestle then pass out! So with my past affiliation with floor comfiness, last year I came across this site Just Floor Cushions when having grand ideas of turning my room into a Pinterest dream, but didn't happen, haha. My room is a tip! So on the site I bought a 36in x 36in cushion with no cover as it was in the bargain corner, thinking I would make a cover for it as I had heaps of material left from when I was making clothes. It arrived in two days...then I just left it. It stayed in the corner unopened from the packaging for way over a year, until last Saturday that it! I was at home, clearing that section of my textile stock and thought, lets make this thing! I cut opened then plastic post bag it came in, and roughly cut some material, dusted off the sewing machine and viola! had an awesome cushion I was dreaming about for a year, within an hour! 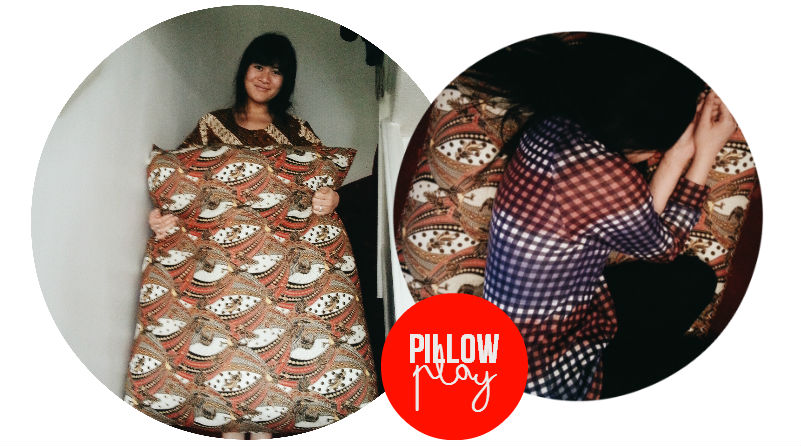
It is quite a big boy, and super comfy. So comfy that I spotted my sister having a little rest on it the other day ^^^. This particular material used is also the same print but in red of a skirt I made which is quite Sound of Music of me. As I am impatient with a lot of things and just want to enjoy the finished product ASAP, I skipped on a lot of processes to make it a lot neater, as if I was going to give it as a present or sell it; but for myself, it's perfect. I may make one more so we can have two for the new flat Chris and I are hoping to move in to after the wedding. I am super into home furnishings at the moment, this is definitely a signifier of me getting older methinks. Oooo!
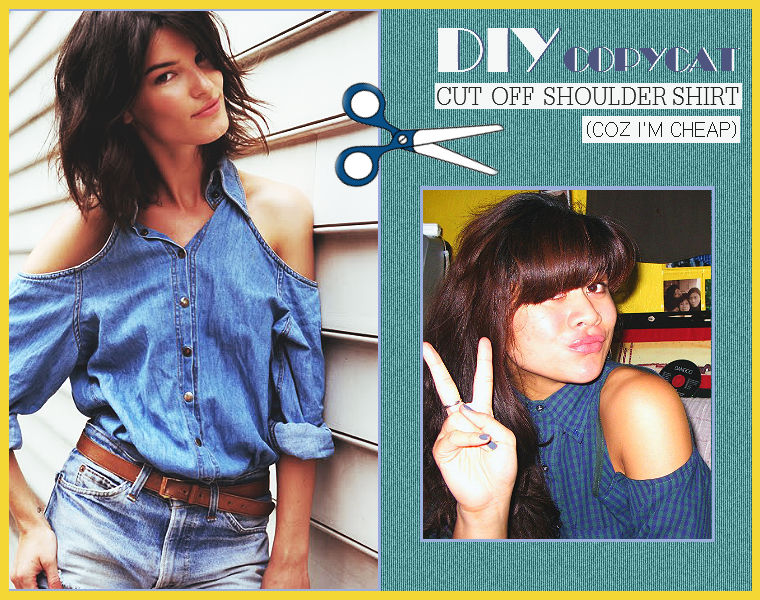
Images: Model Babe I did a previous DIY of a RINGCLET (Ring & Bracelet) after being inspired by seeing something on Manrepellar. Well I have been thinking about making this cut out shoulder shirt for sometime and never got round to it. It's a look and style thats been around on a few style blogs for a while, and seen on collections like Nastygal and Chole Sevigny's collaboration with Band of Outsiders. When I finally did I knew that this would be a good chance to do another DIY post. I attempted this whole cut off shoulder thing with a tie dye tee a few months ago and wore it here and there, mostly at home as I never got round to sewing the edges so looked a bit budget. Anyhoo, I digress...welcome to the step by step guide of making your own CUT OUT SHOULDER SHIRT.
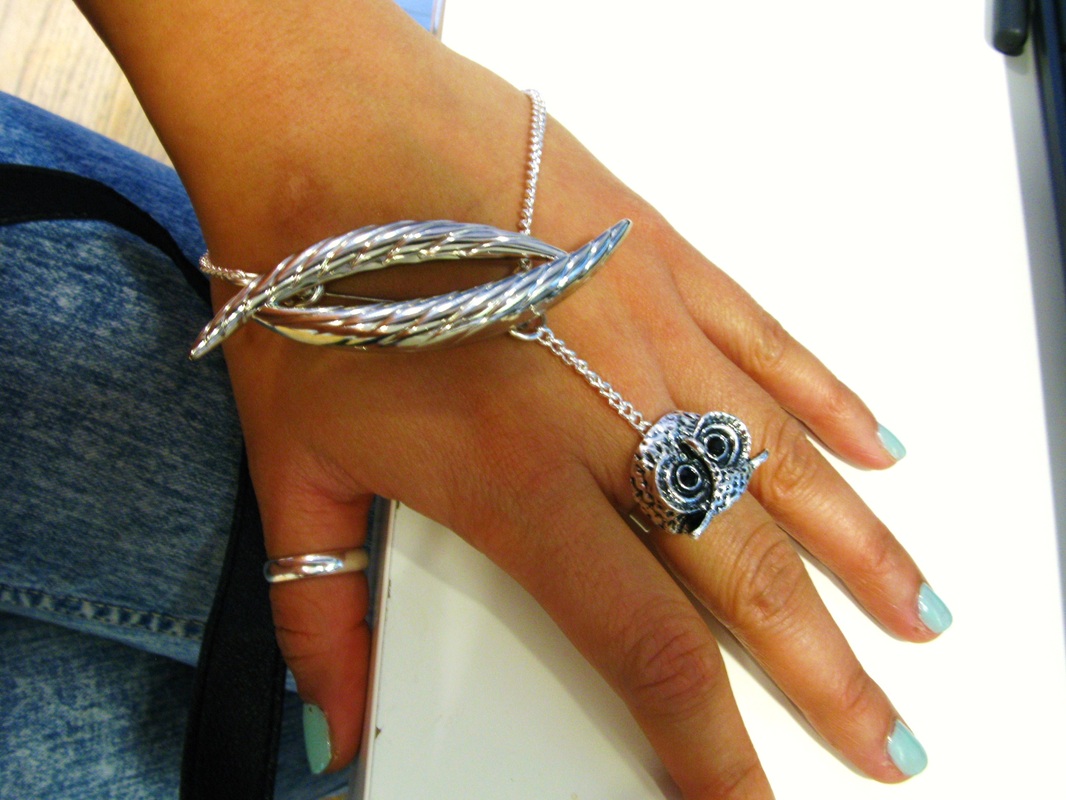
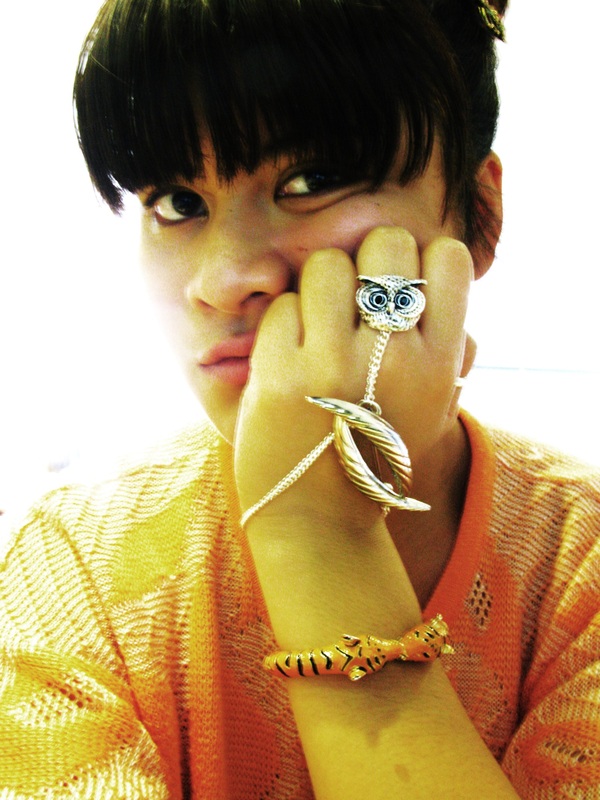
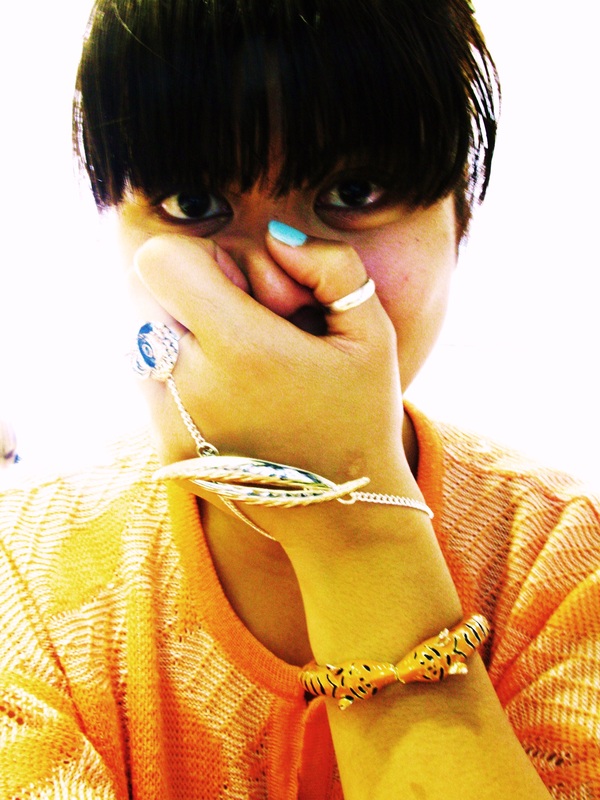
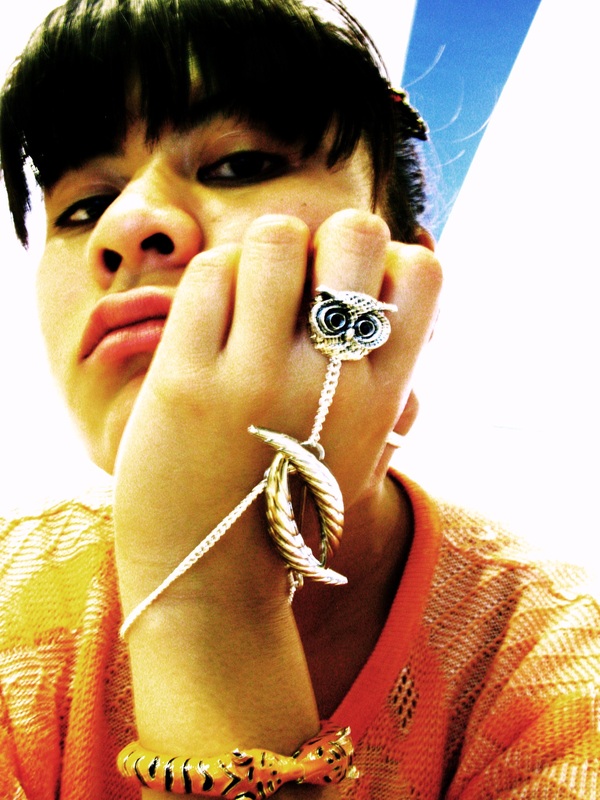
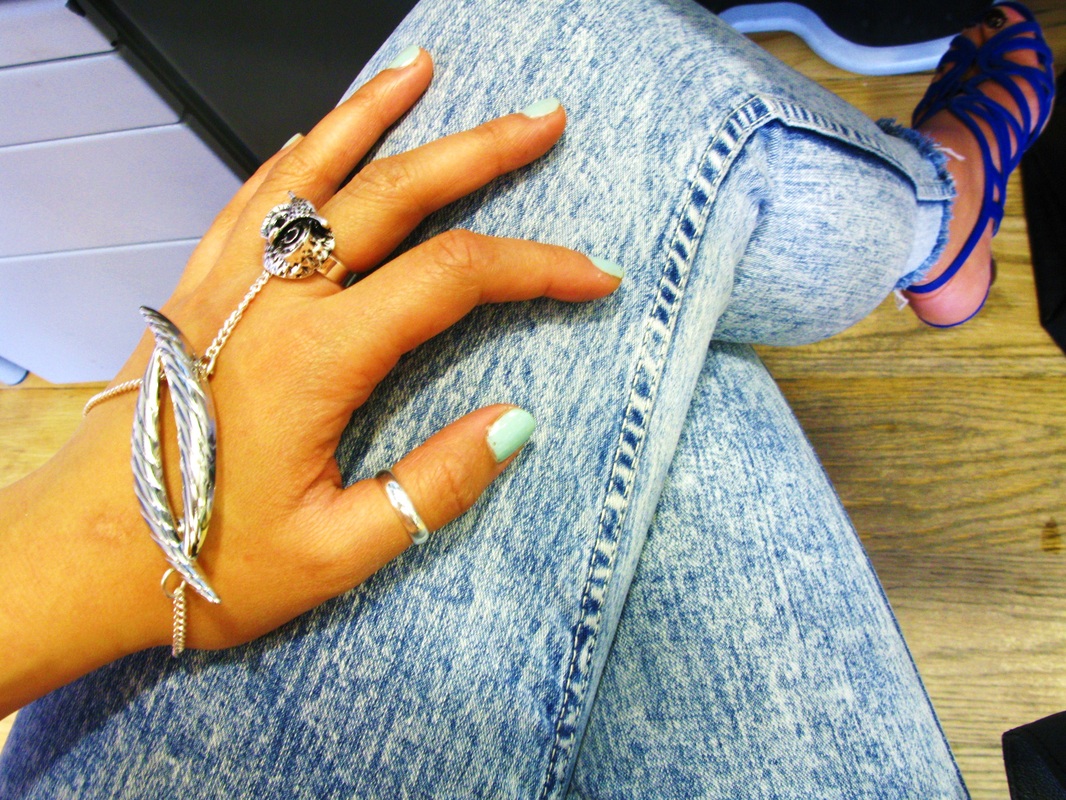
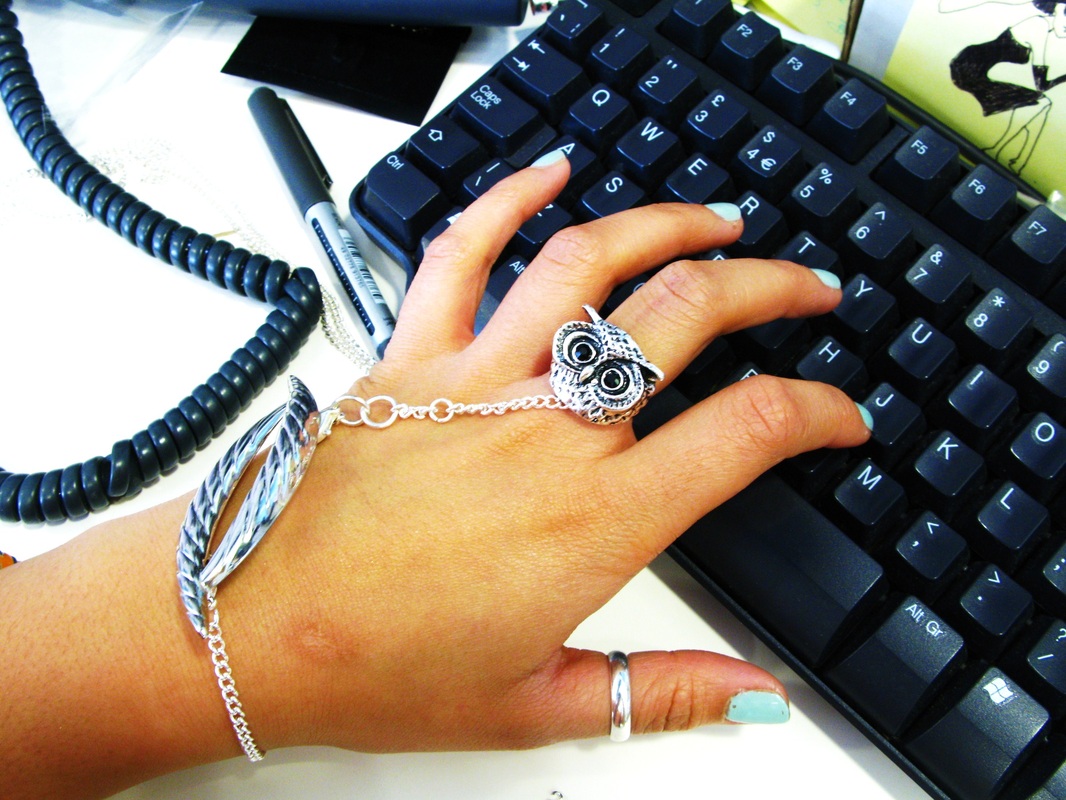
I was on The Man Repeller blog today which is pretty cool, and funny (www.manrepeller.com) and I saw these super cute Lovebird Bracelets from Anarchy Street (www.anarchystreet.com) which is an American based store...and have sold out of this product :( 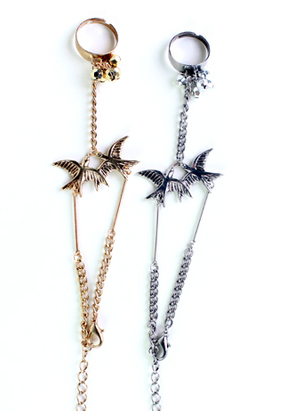 Struck by a sudden desperation to own it or something similar I thought, I can make one! So I did. I had a quick lunch break from work and shuffled down to Soho to a Fashion Jewellery supplier and bought... a ring, a brooch, a silver chain and some fasteners. 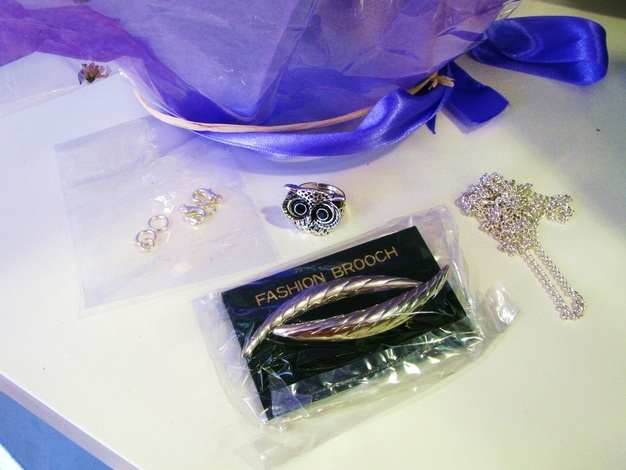 I chose the owl ring (£3) because...who doesn't like them? No one, exactly! They are universally adorable, and the brooch (£2.50) seemed to go with it and remind me of feathers so I opted for that one. The plain chain was £2. So back at my desk and armed with my trinkets and a pair of scissors I first layed out where all the pieces would rest on my hand. (Note, if making this remember to measure when you bend your fingers too.)  Now that you have all your measurements of your chain lengths (one for the bracelet and the other to attach the ring to the brooch) get the piece for the bracelet and attach to loops on either end and the fasten them to the two edges of the brooch pin. 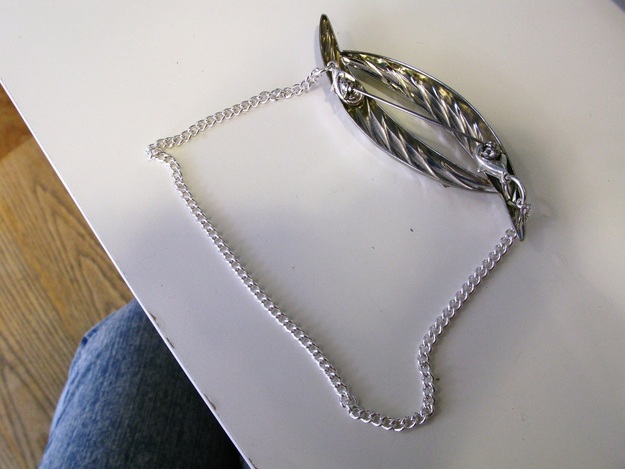 Depending on what type of ring you decide to buy, it will determine how you attach the chain to it, try and keep this in mind when buying the ring, or if skilled enough you could probably get away with super glueing a ring fastener somewhere. Behind the owl face and ring there was two little gaps that allowed me thread the chain in to secure it. 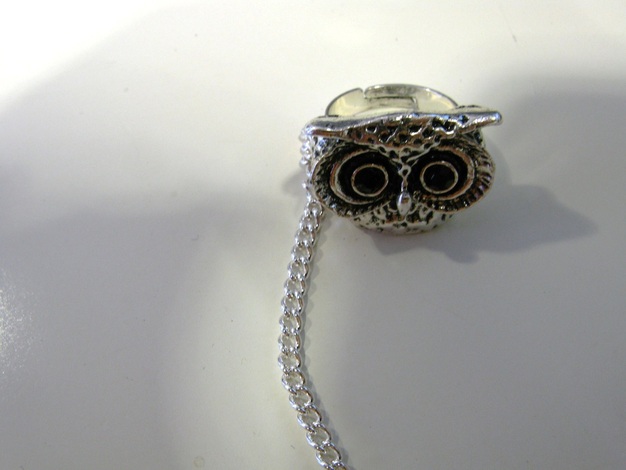 Now you have the fun part of attaching the ring and the bracelet together. Add another chain loop to the end of the ring chain and attach it together with one of the edges of the brooch. This creates a sort of lop sided affect which works for my peice but you may need to play about with positioning depending on what makes up your own one. Once the two are attached then BOOM! You have your very own Ringclet or Bring...or just plain old simple Ring and Bracelet. 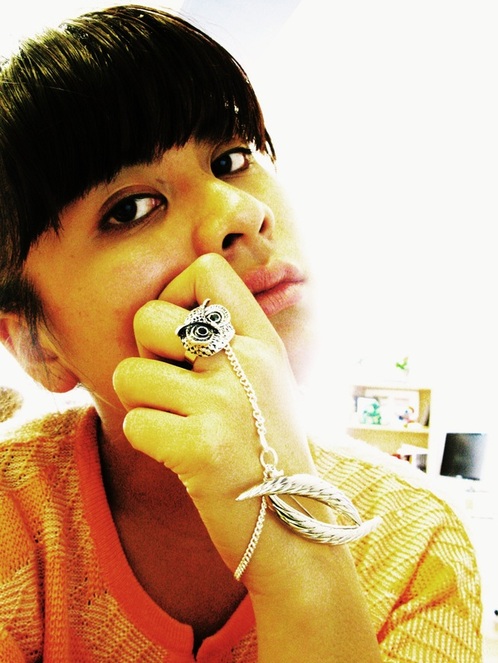 Now I leave you with more photos of me just enjoying my new bling! |
MAMA BAMBOO
London Girl.
Mama to Maya. Daughter of Filipinos. Wife of a Mexican'ish. Urban heart + Island soul. Right brained. Left brained. Likes to see & likes to do. Food. Travel. Photography. Fashion. ..... Arsenal supporter. THIS BLOG WILL SHOW ALL OF THE ABOVE IN SOME SHAPE AND FORM Categories
All
 Archives
August 2019
|


 RSS Feed
